Creating consistent edits is easier with ClipMode’s image-to-image (i2i) feature. Refine portraits, change scenes, or shift styles with prompts — without affecting everything else in the photo.
What is ClipMode Image-to-Image Editing?
ClipMode’s i2i tool lets you modify an existing gallery image with text. Want a new outfit, background, or style? Describe it — ClipMode handles the rest, no masks or layers required.
Open any image in your gallery, tap Edit (1 credit), pick a quick option or write a custom prompt, then generate.
Quick Edits Made Simple
You can make quick visual edits like:
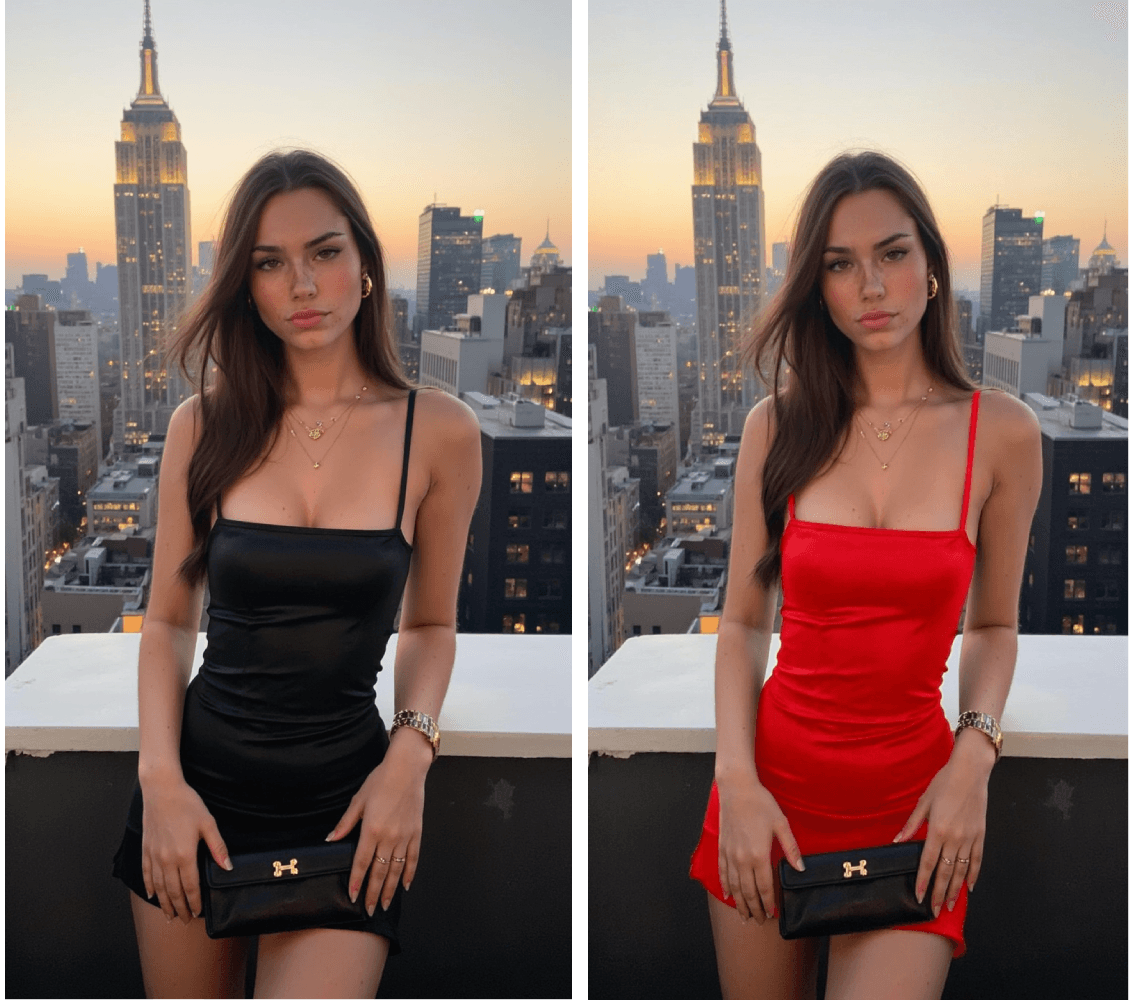
These prompts work well for basic object or background changes. Keep in mind: the simpler the prompt, the more room the AI has to interpret — and it may change more than you intended.
Be Clear and Specific
For more control, add precision to the prompt.
Output 1: Change the image to night time.
Output 2: Change the image to night time and fix the lighting style of the woman.
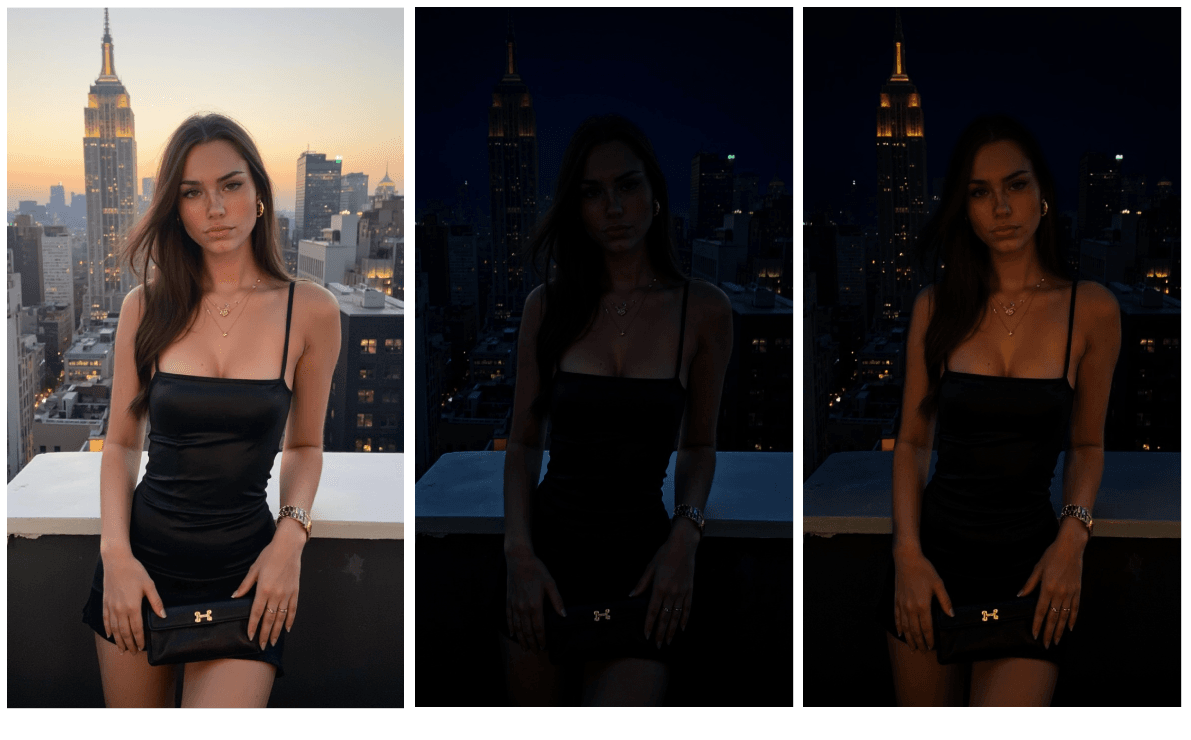
The second prompt tells ClipMode both what to change and how to treat the subject.
Change Style with Prompts
ClipMode supports a wide range of style transformations. For better results:
- Name the specific style. Instead of “make it creative,” say exactly what you want — e.g. “Transform into Ghibli animation style” or “Convert to charcoal sketch.”
- Mention known artists or styles. Reference movements or creators like “Picasso-inspired painting” or “80s retro graphic style.”
- Describe the style visually. If naming the style isn’t enough: “Turn into oil painting with visible brush strokes and rich texture.”
- State what should stay the same. Example: “Convert to digital painting while keeping the facial features and pose unchanged.”
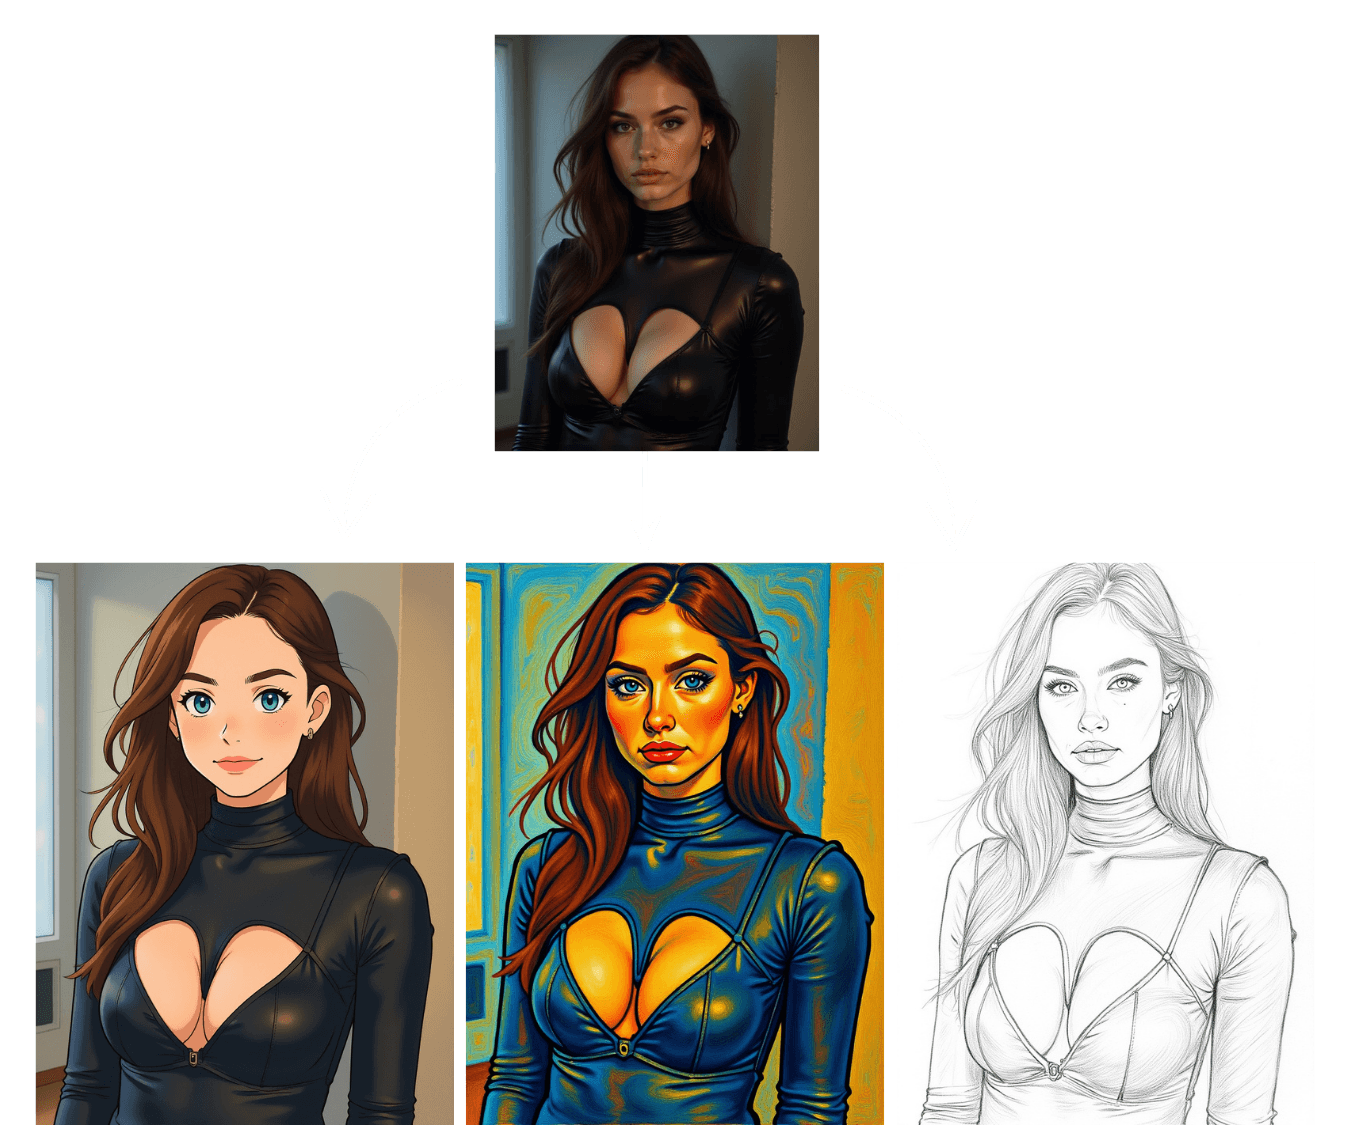
Iterative Editing & Character Consistency
ClipMode’s i2i keeps characters consistent across multiple edits. Here’s a sample sequence where identity holds as the scene changes.
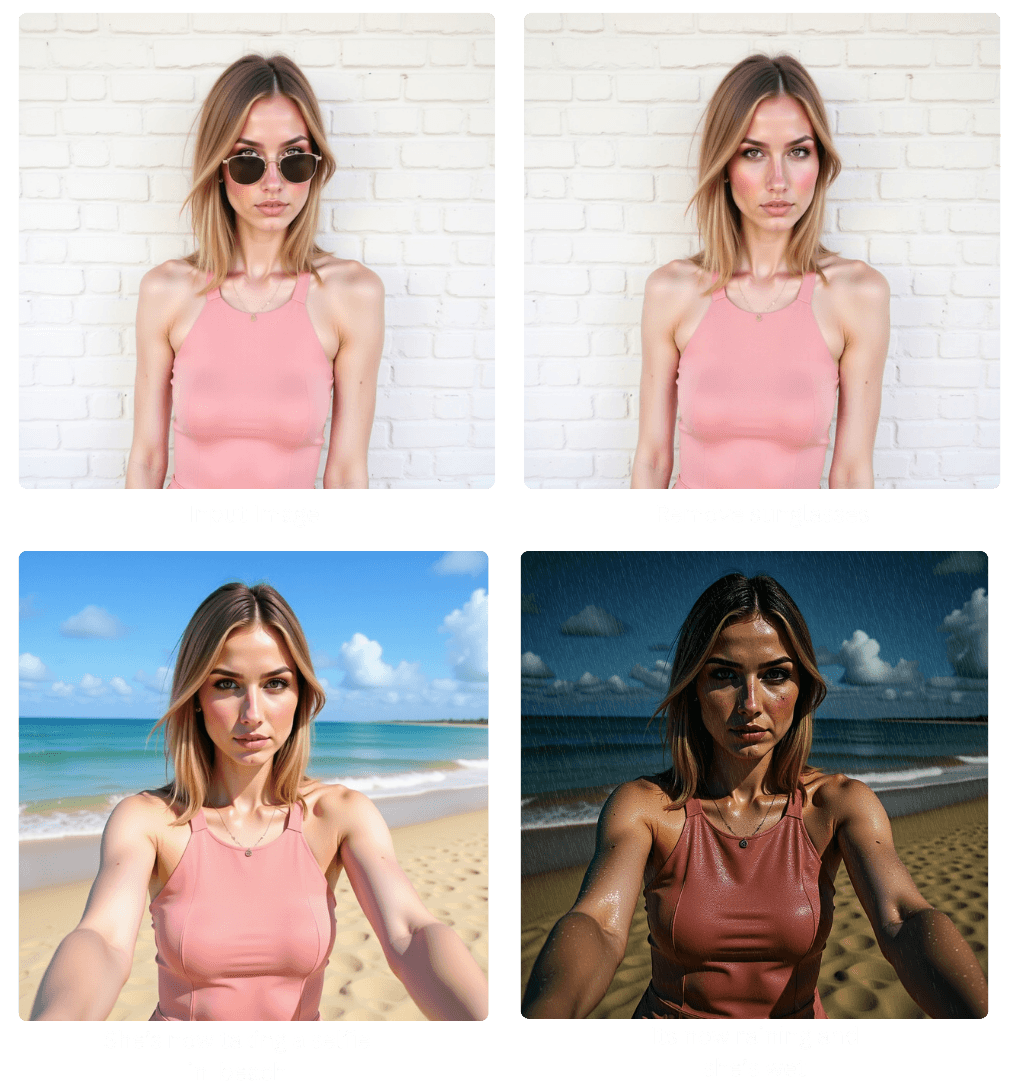
- Identify your character clearly. Use a prompt like “the woman with short black curly hair and freckles.”
- Describe the new context or change. Say “now she’s in a coffee shop” or “change her outfit to a red coat.”
- Point out what should stay the same. Mention specifics: “keep her hairstyle and face,” or “make sure her expression and pose don’t change.”
Being detailed helps ClipMode hold onto identity — hairstyle, facial structure, and vibe — even as you shift location, clothing, or scene. Avoid vague terms like “her” or “this person.” Repeat a clear description when chaining edits.
Text Edits in Images
You can update text inside posters, signs, or labels.
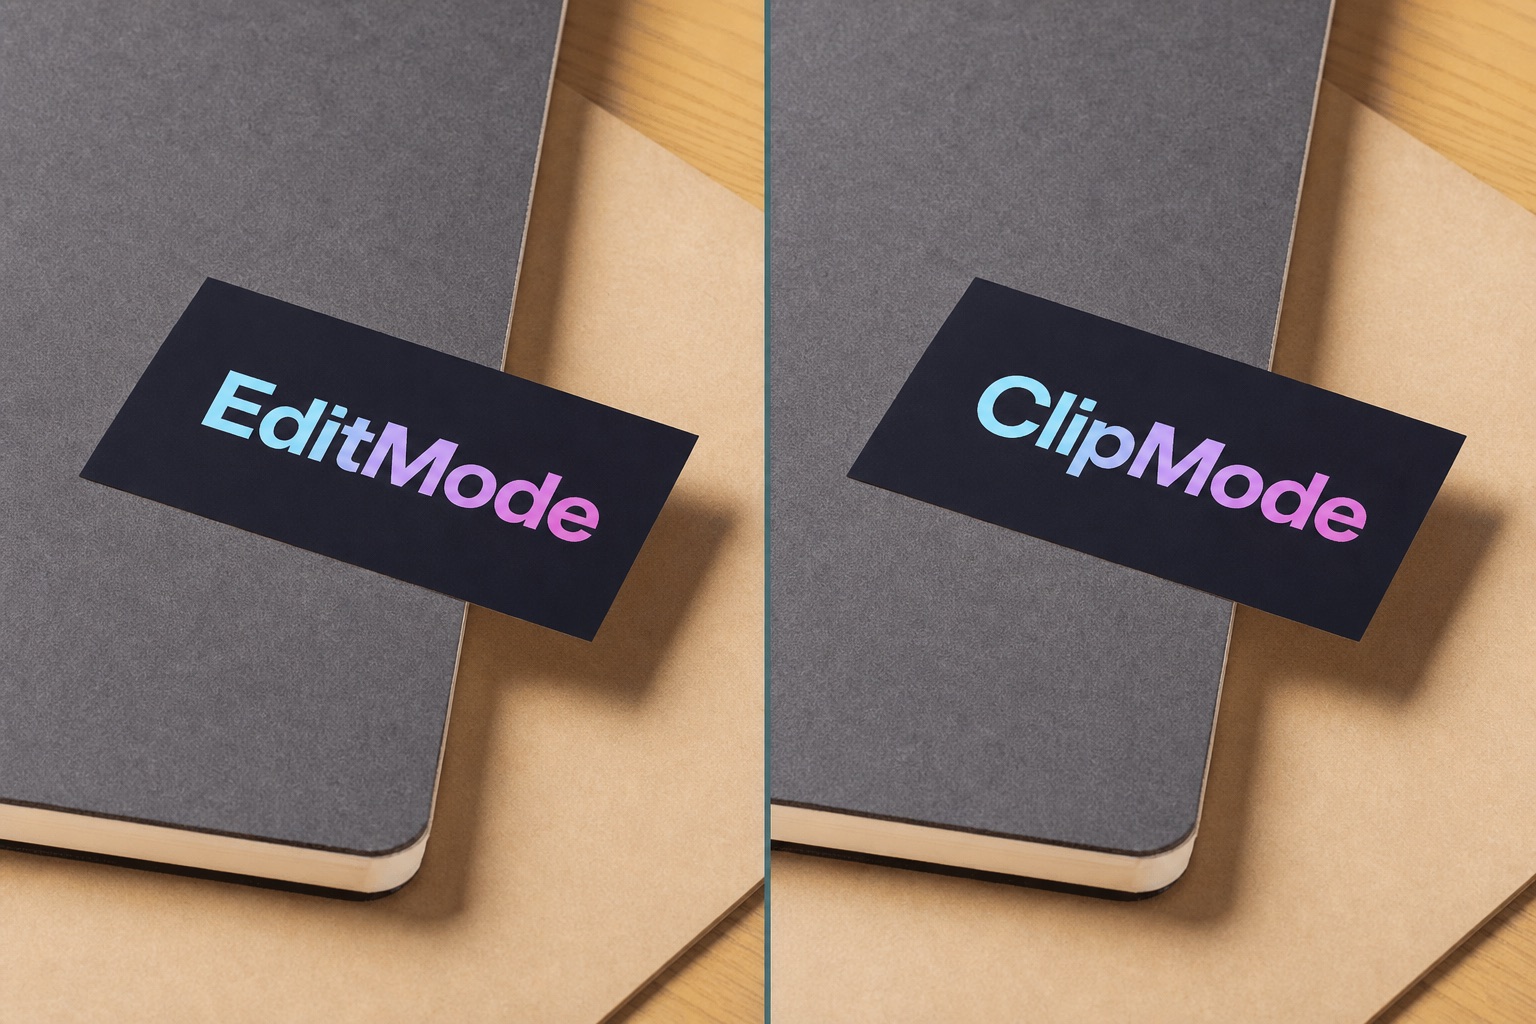
- Use clean fonts — decorative or distorted fonts reduce accuracy
- Say what to keep: “Replace ‘Summer Sale’ with ‘New Drop’ but keep the same color and font style.”
- Match text length — big length changes can shift layout
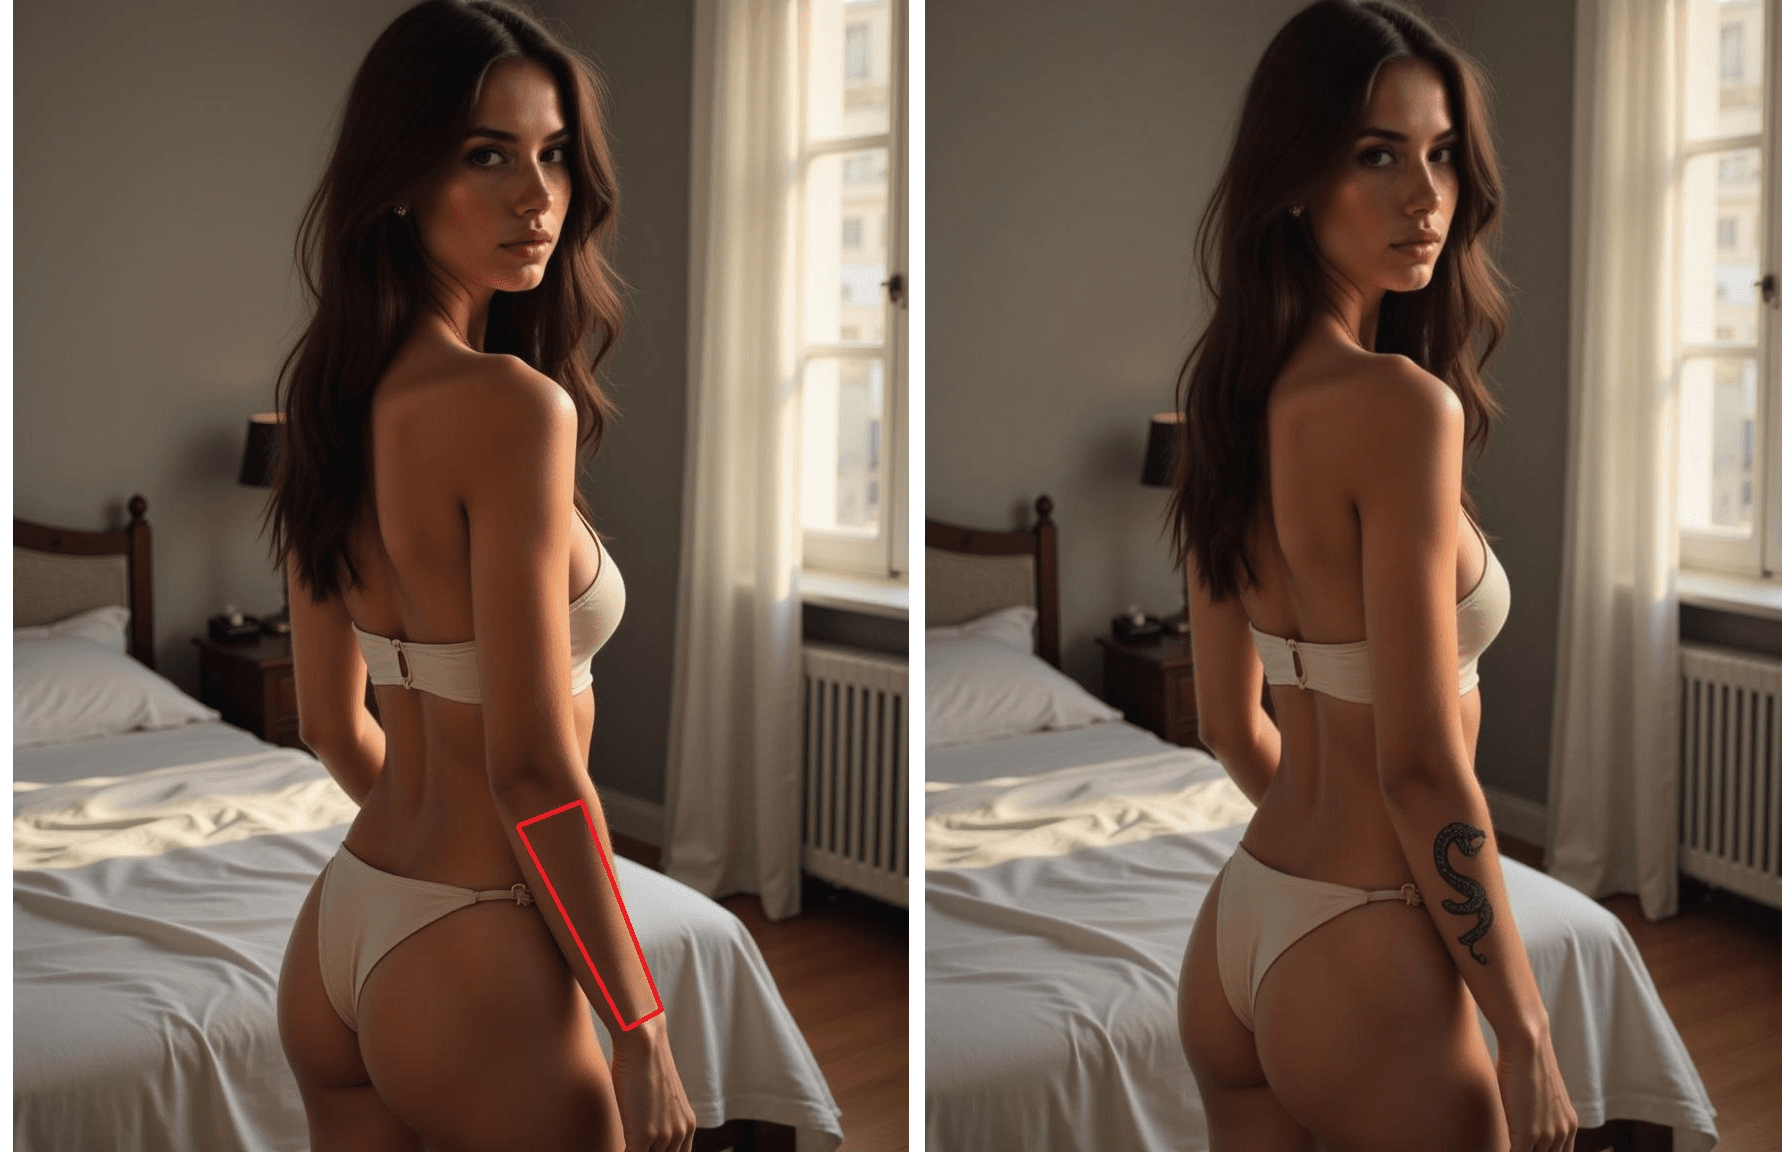
Visual Cues for Focused Edits
Guide edits to a specific part of the image with a visual cue. For example, highlight a region and say: “Add a snake tattoo inside the red box.”
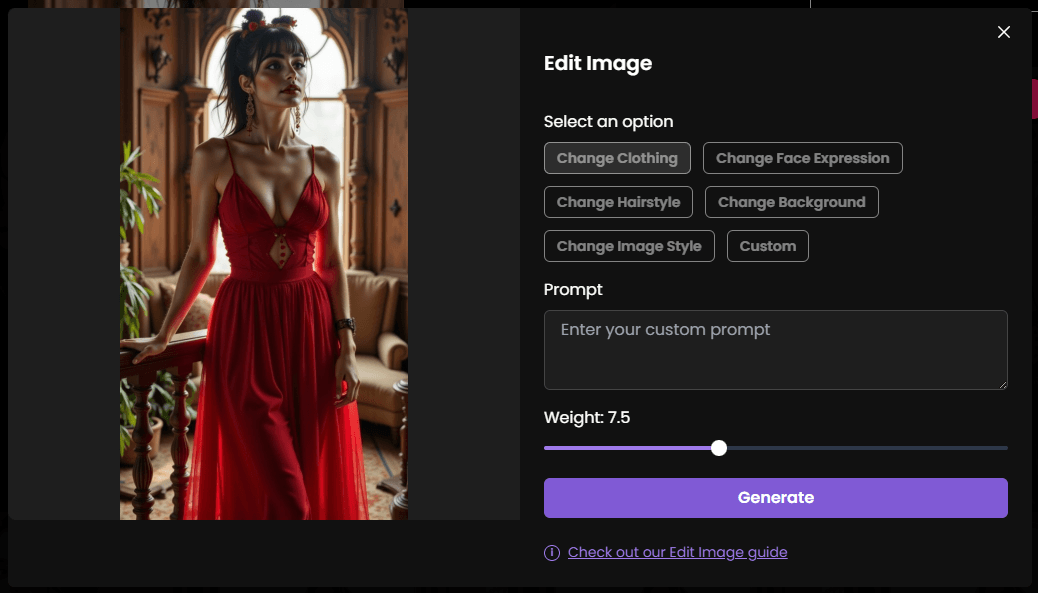
Weight Slider
The Edit Image modal includes a Weight control that sets how strongly your prompt influences the output. The default is 7.5. Adjusting it can soften or amplify the edit.
Prompt: Change to night time
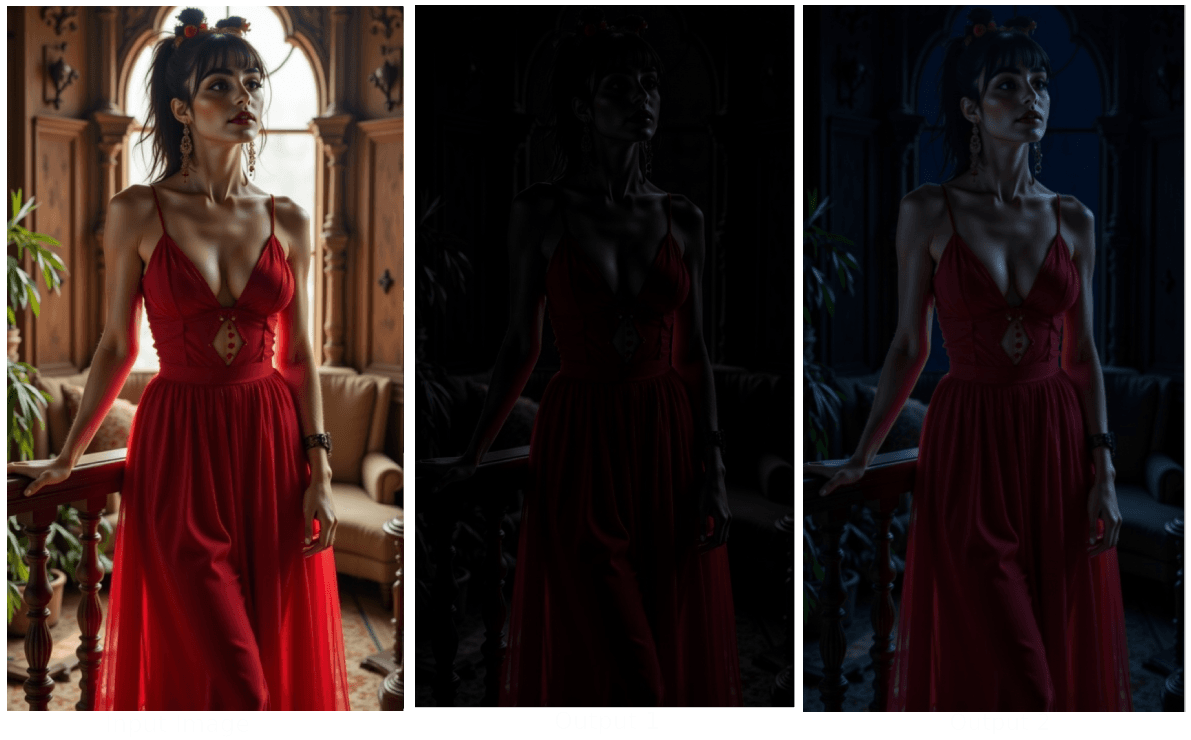
Tip: If you’re not getting the result you want, lower the weight to soften the effect or raise it to amplify it.
Can It Be Used To Modify Outfits?
Yes. Adjust clothing with descriptive prompts while keeping pose, lighting, and camera angle intact. Prefer concrete instructions over vague ones like “change clothes.”
You can also combine clothing and posture changes — for example: “Replace the black crop-top with an oversized pink shirt, with the person standing in a confident pose. Keep facial features and background unchanged.”
Common Issues & How to Fix Them
Identity drift
Prompts like “turn him into a wizard” can rewrite the whole person.
Fix: “Change his outfit to a wizard robe, but keep his facial features, hairstyle, and expression the same.”
Unwanted scene changes
“Put her on a beach” may rewrite the whole composition.
Fix: “Change the background to a beach while keeping her pose, position, and camera angle exactly the same.”
Style mismatch
Vague style asks produce random results.
Fix: “Convert to pencil sketch with fine graphite lines and cross-hatching.”
When to Retry
If your output isn’t quite right:
- Refine the prompt with more clarity
- Rephrase what should stay untouched
- Try a clearer source image
- Break big changes into stages
Your prompt is the key. Try, tweak, and bring your ideas to life on ClipMode.